Sublimation is transforming the world of crafts. Back in 2020, when I started sublimation printing, hardly anyone knew about it. Now, in 2024, the term “sublimation” is searched an astonishing 331,000 times every month!
This sublimation for beginners guide is your go-to resource for understanding the basics of dye sublimation, what you need to get started, and learning how to achieve consistent, high-quality results.
Also, I’ll share some tips and tricks to help you prevent beginner mistakes in your sublimation journey. Let’s begin!
- How Does Sublimation Work?
- What Can You Sublimate On?
- What Colors Can You Sublimate On?
- What Do You Need to Get Started?
- Sublimation Blanks
- Sublimation Printing Process
- Where Can I Get Designs for Sublimation?
- Is It Hard to Get Started in Sublimation?
- 5 Essential Sublimation Tips for Beginners
- Sublimation FAQs
- What's Next?
How Does Sublimation Work?
Dye sublimation printing, or simply sublimation, is a unique printing technique that lets you transfer the design from paper to various materials like fabric or metal by applying high temperatures.
Here’s a step-by-step breakdown of how it happens:
- Print Design: First, you print your design onto a specific type of paper using sublimation ink.
- Heat Transfer: Next, you place the paper onto the material you want to print on, like a t-shirt, and use a heat press to apply high temperature.
- Ink Transformation: Under the heat, the ink on the paper turns into a gas, absorbing into the material.
- Cool Down: Once the heat is removed, the ink turns back into a solid, but now it’s a permanent part of the material.
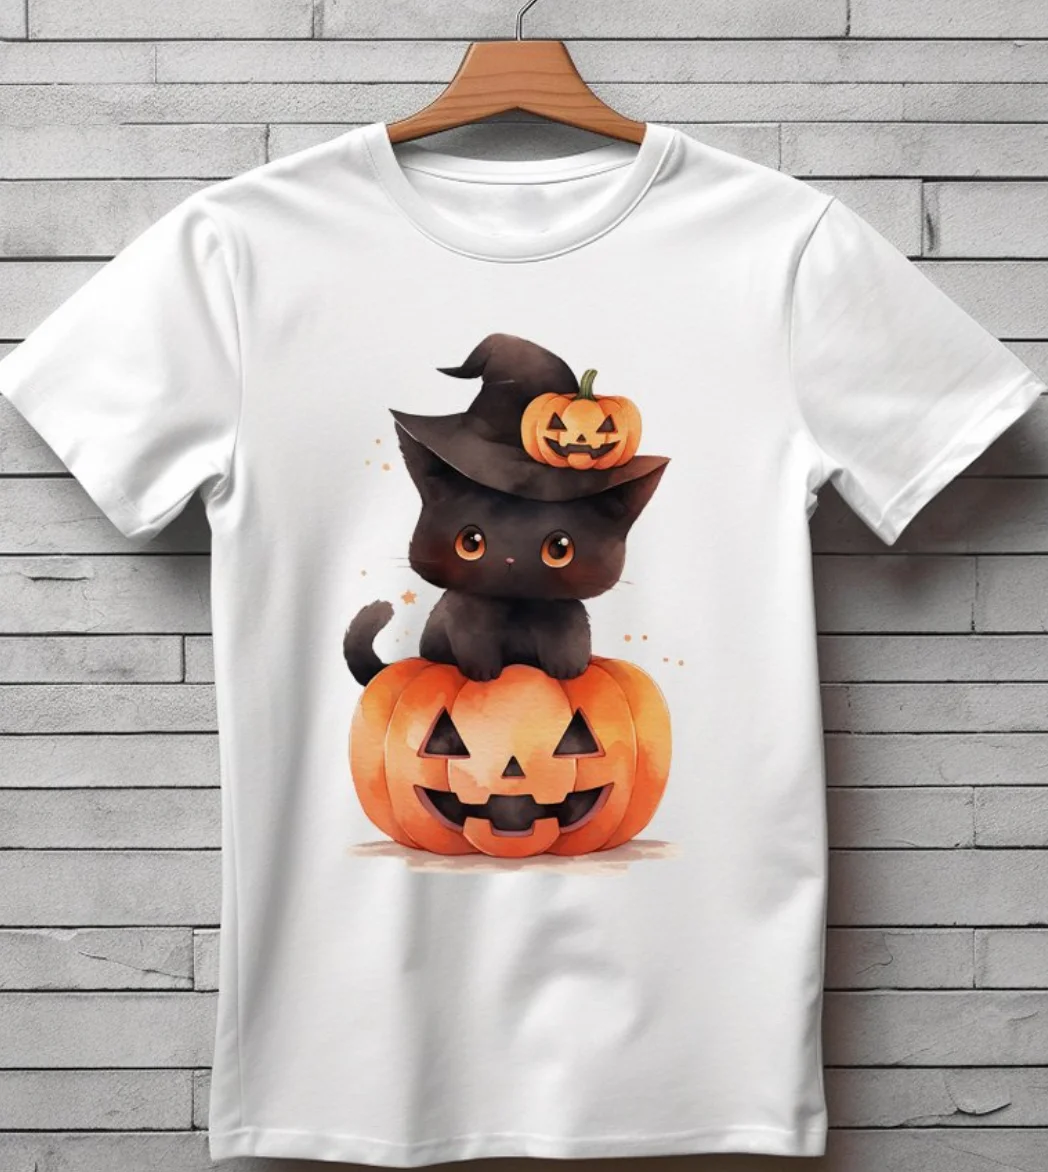
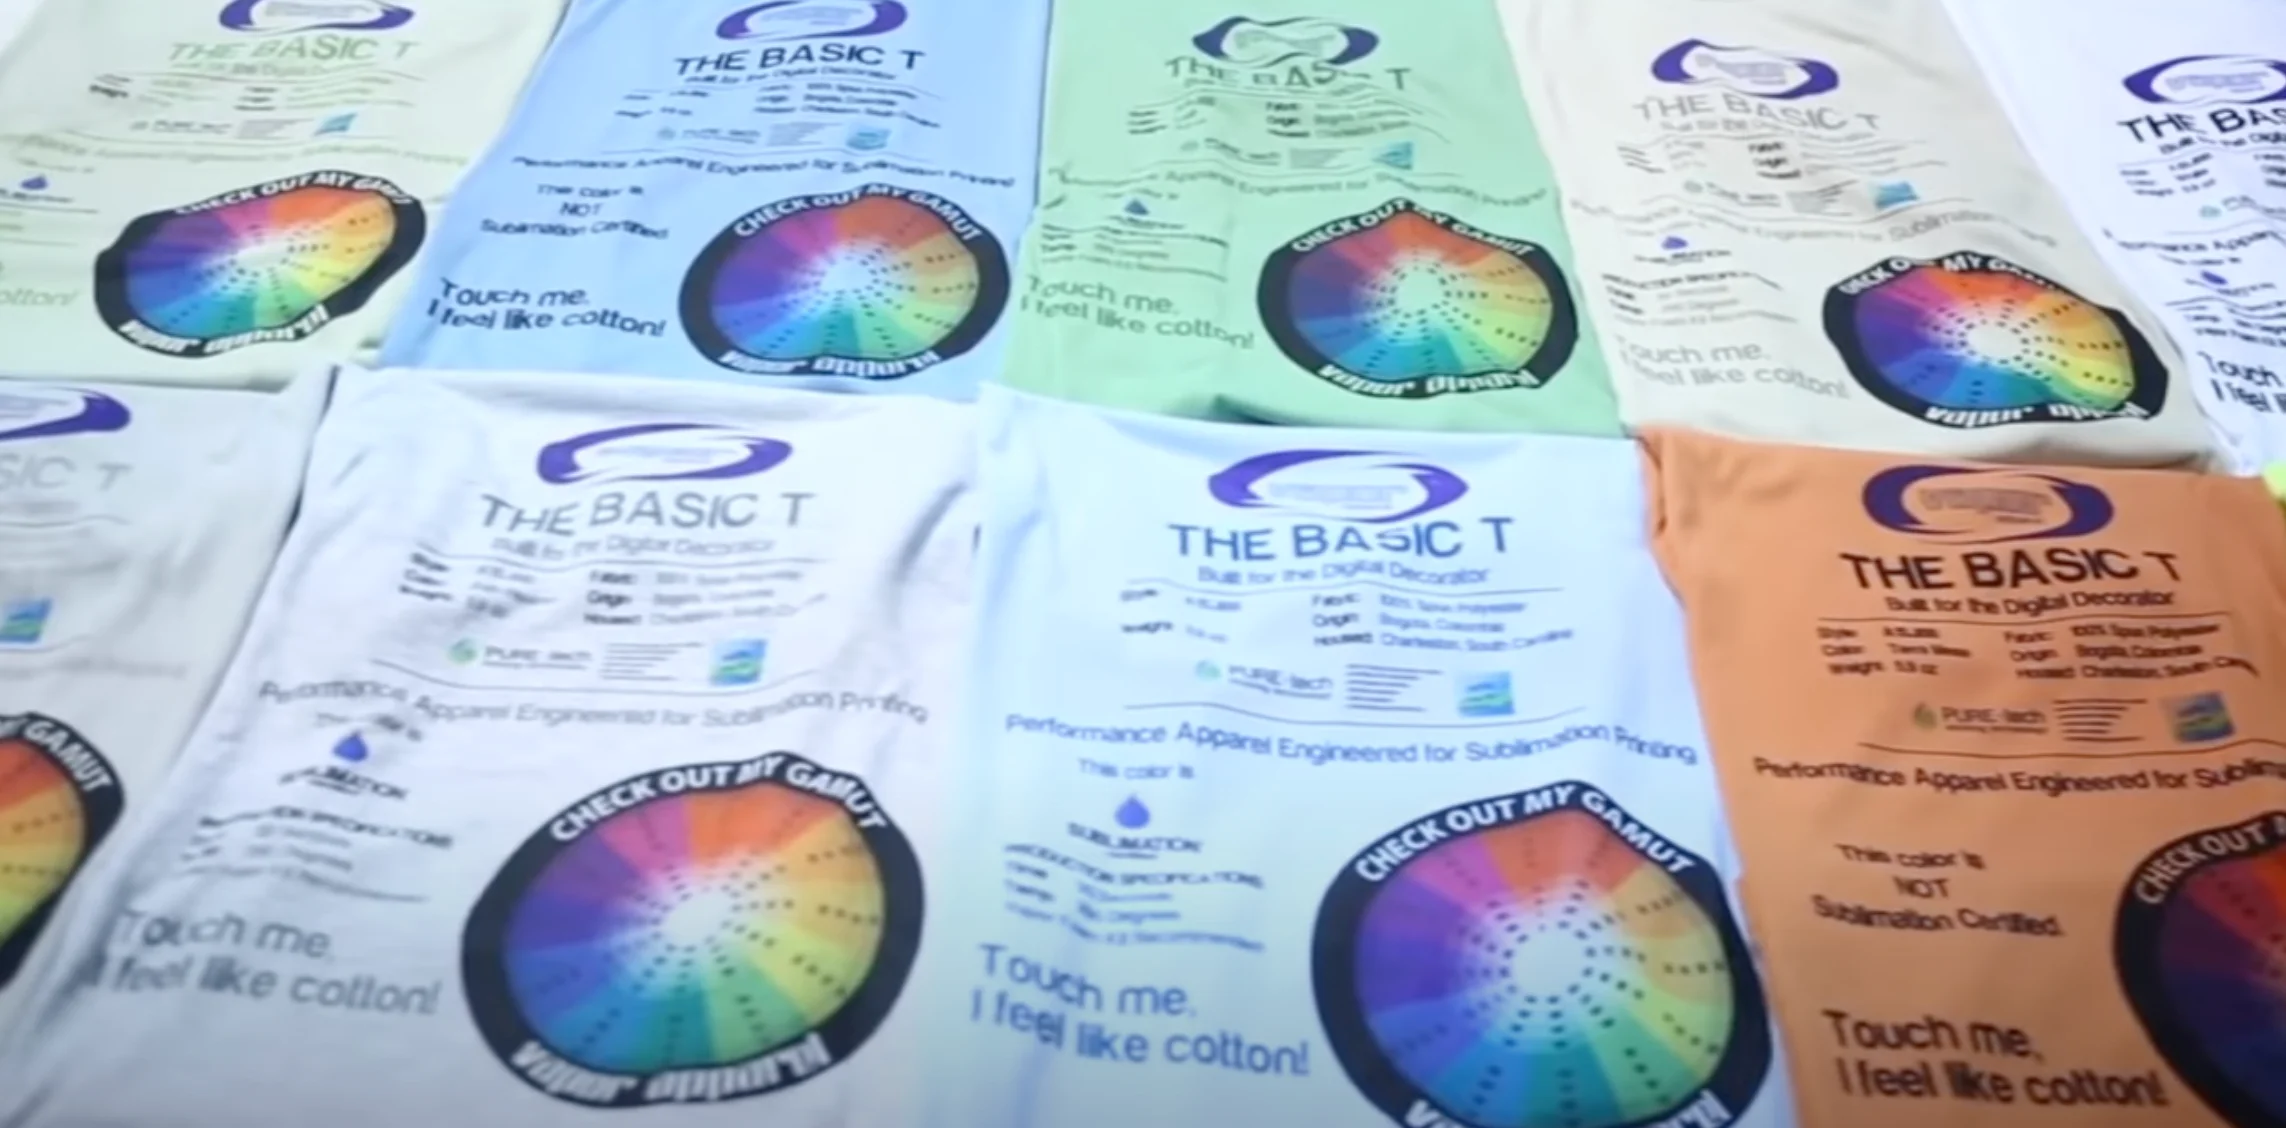
Here’s an example of a Halloween T-shirt that you can create using sublimation:
Unlike regular printing, sublimation requires a specific printer, sublimation paper, and sublimation ink.
However, the process is quite similar – print, press, and voila! Your design is now a long-lasting imprint on your chosen material.
One of the big advantages of sublimation is that the design becomes a permanent part of the item, so it won’t crack, peel, or fade away. In other words, your print will last for the entire object’s lifespan.
What Can You Sublimate On?
You can sublimate on many materials and shapes! Sublimation printing creates colorful designs on polyester and products with polymer coating.
It means you can instantly print designs on polyester items, including T-shirts, tote bags, door mats, towels, flags, socks, and more. You can also sublimate on polymer-coated items such as puzzles, tumblers, and a TON of other things.
You can apply a sublimation coating with sprays or buy ready-made products. More experienced crafters can even sublimate on wood and glass using special layers.
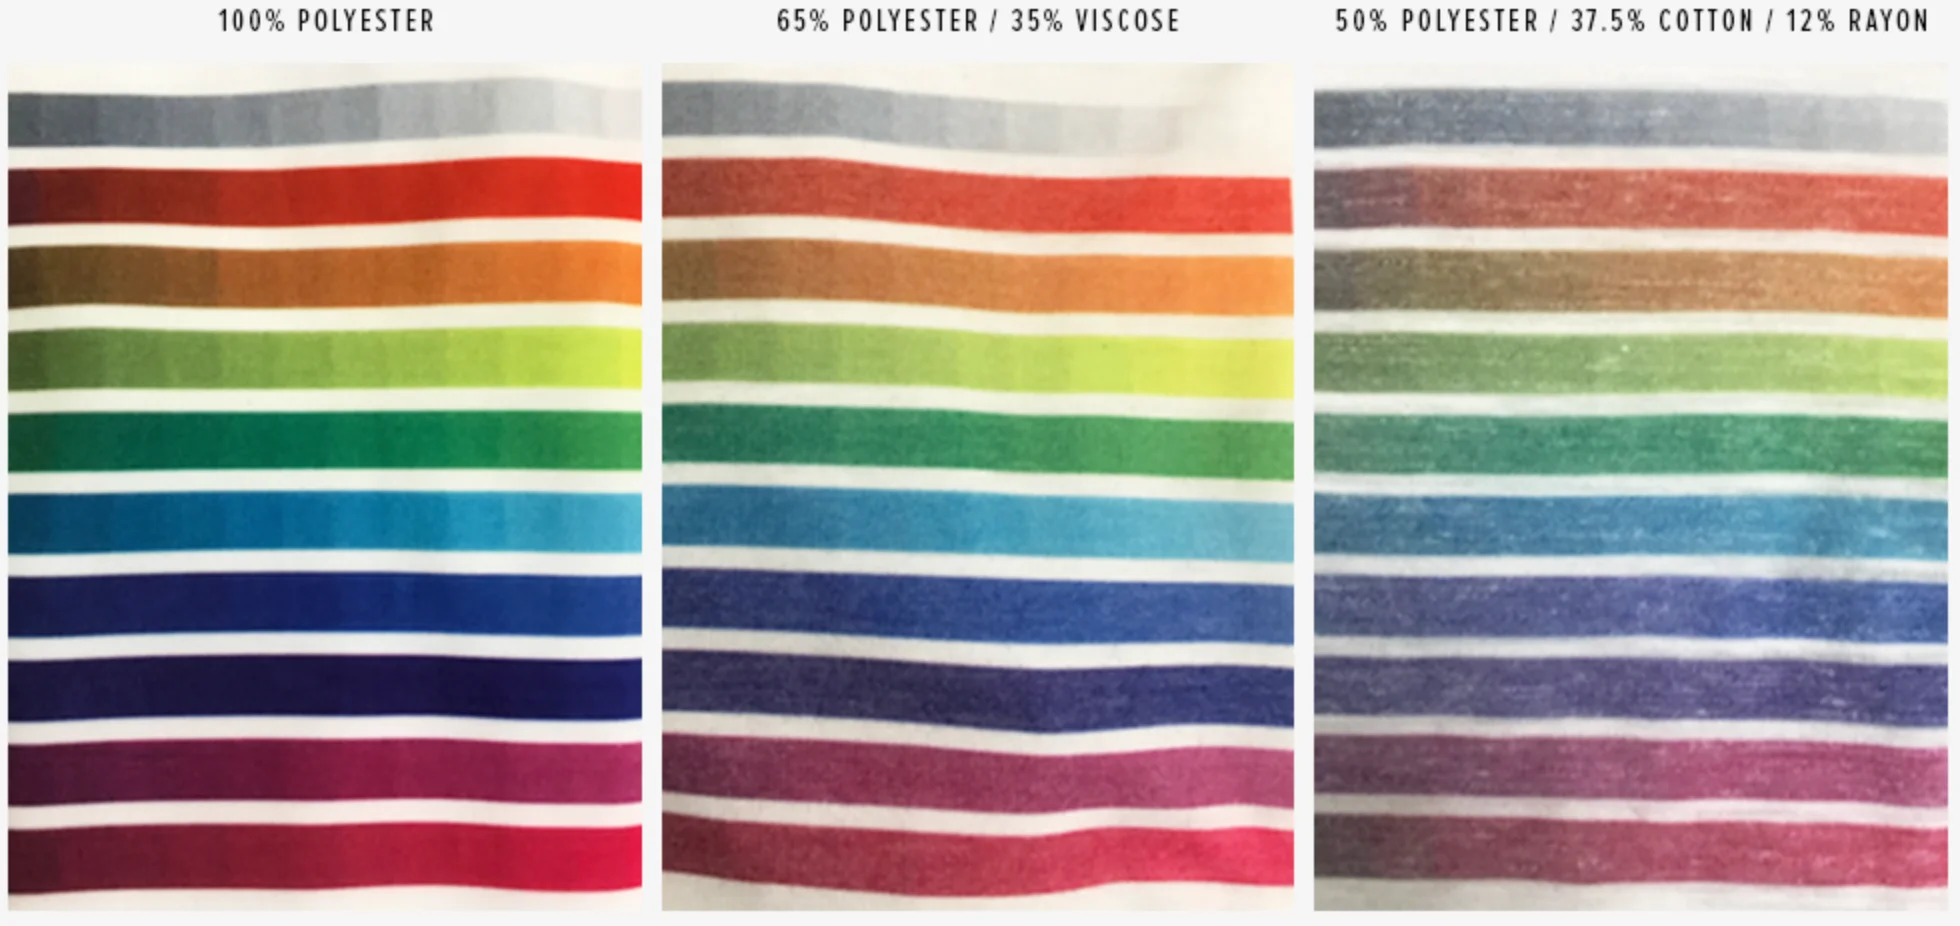
You don’t have to use 100% polyester – blends also provide excellent results!
100% polyester creates rich and colorful designs, 65%+ polyester gives a vintage look, and 50%+ polyester produces a faded look.
What Colors Can You Sublimate On?
Sublimation ink is transparent, so the fabric color plays a huge role in the final design. Also, sublimation can’t produce white paint – it simply leaves this area blank.
It means that “white” areas will be transparent and adopt the background color. So, a white design will be orange on an orange T-shirt and green on a green towel.
It is possible to sublimate on dark fabrics, but you’ll need to use a white base like white glitter iron-on vinyl or white flocked vinyl. You will actually print the design on the white base first and then transfer it onto the dark fabric.
White or light-colored items are the best choice for beginners in sublimation. You can print on them and get colorful results right away without any extra products.
As you become more comfortable with sublimation, explore different fabric colors and even challenge yourself with darker fabrics.
What Do You Need to Get Started?
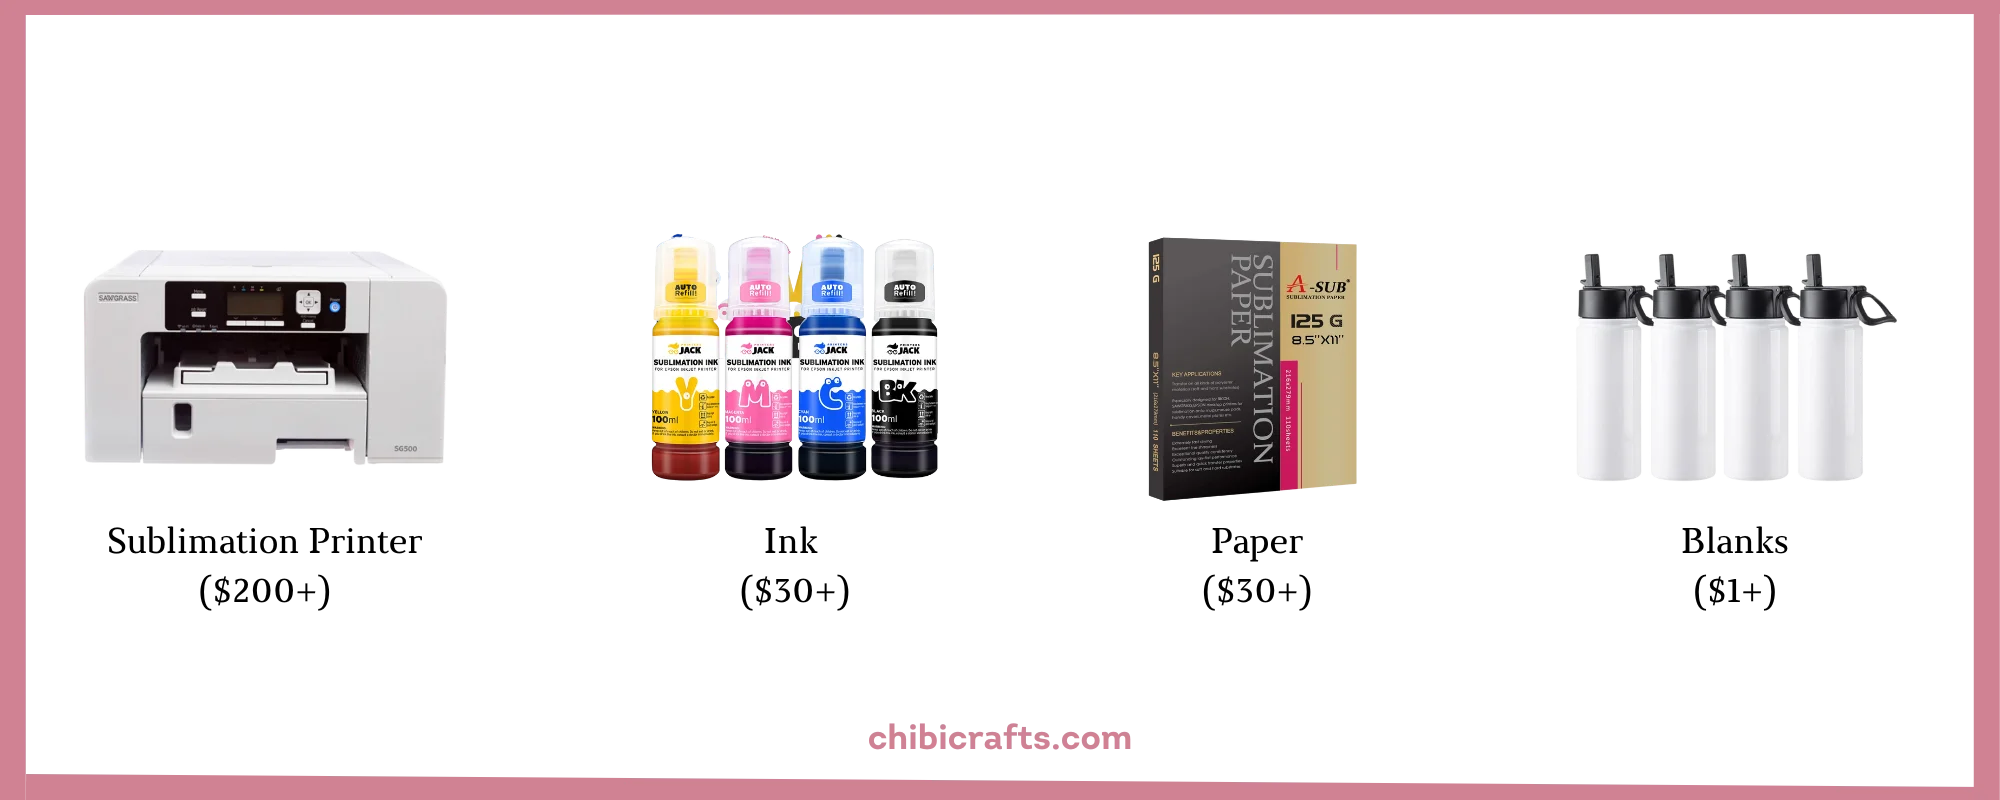
Sublimation requires a printer, heat press, paper, ink, blanks, and protective accessories. You may have some of these if you’ve done other crafts, but others are specific to sublimation.
I will explain how to choose reliable sublimation tools and supplies to get consistent, high-quality results. Here’s a list of what you’ll need:
Sublimation Printer
You can choose from two types of printers: purpose-built and converted inkjet printers.
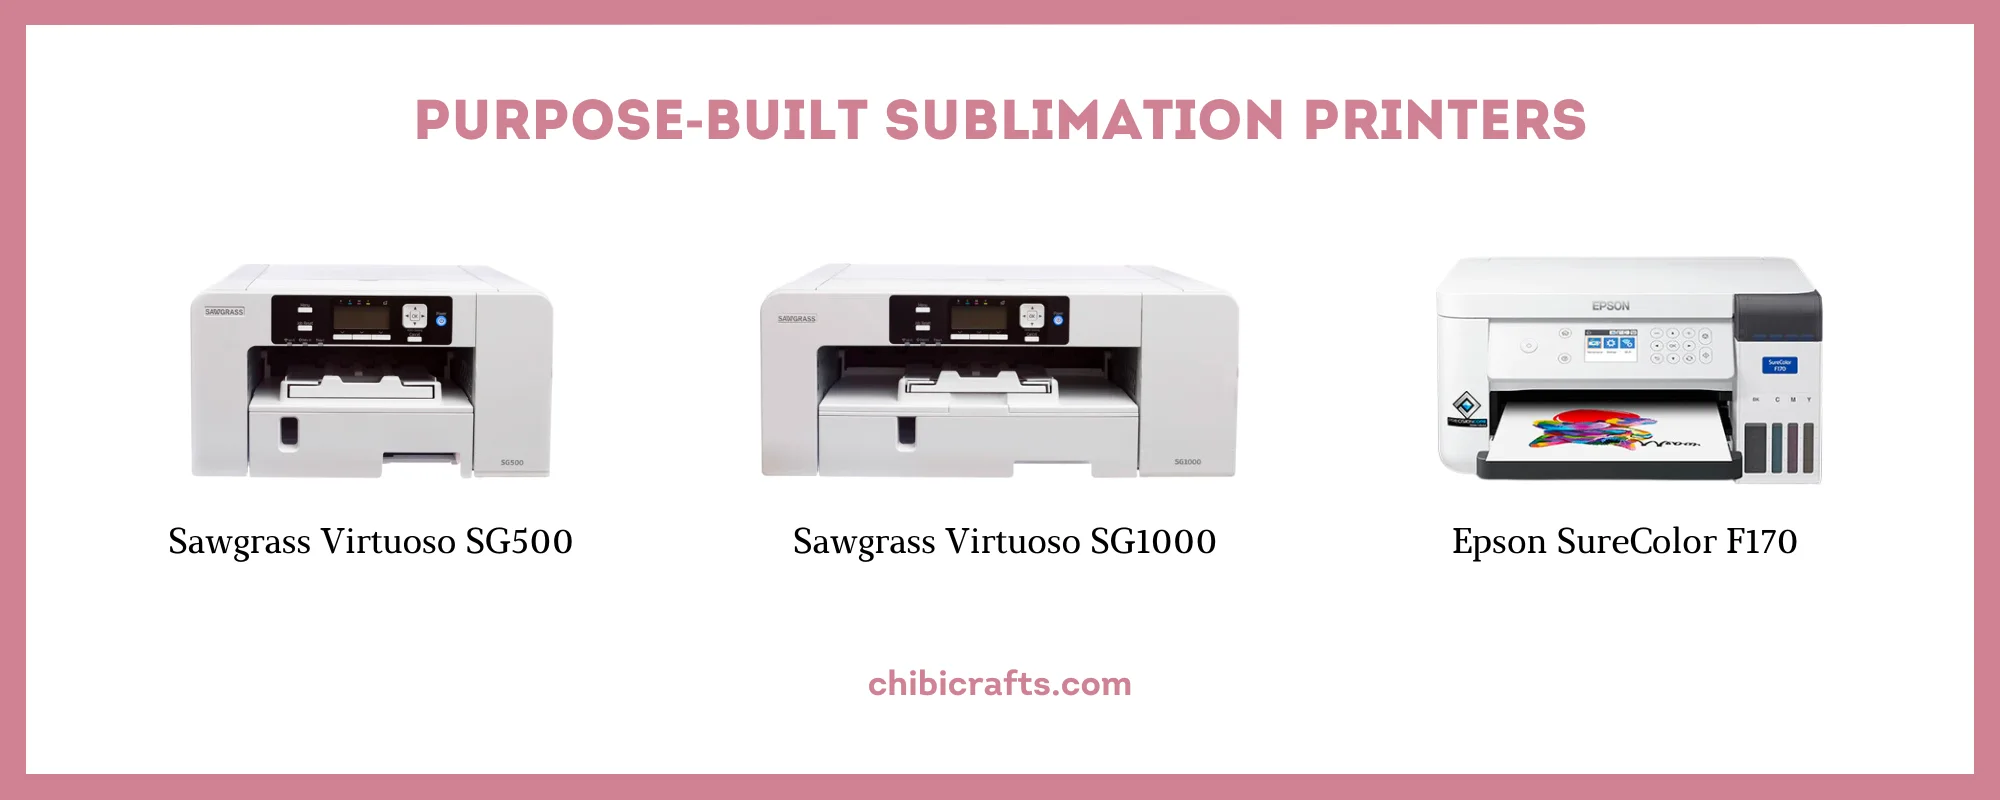
Purpose-built sublimation printers are designed specifically for dye sublimation. They are easy to set up, and support is always ready to help you. Sawgrass even creates free courses and software that come with their printers. They produce beautiful prints but can be pricey.
“True” sublimation printers cost 2-3 times more than converted ones, and their ink is 2 times more expensive.
If you can afford it, go for the Sawgrass Virtuoso SG500 or Epson SureColor F170. They’re top-notch and user-friendly.
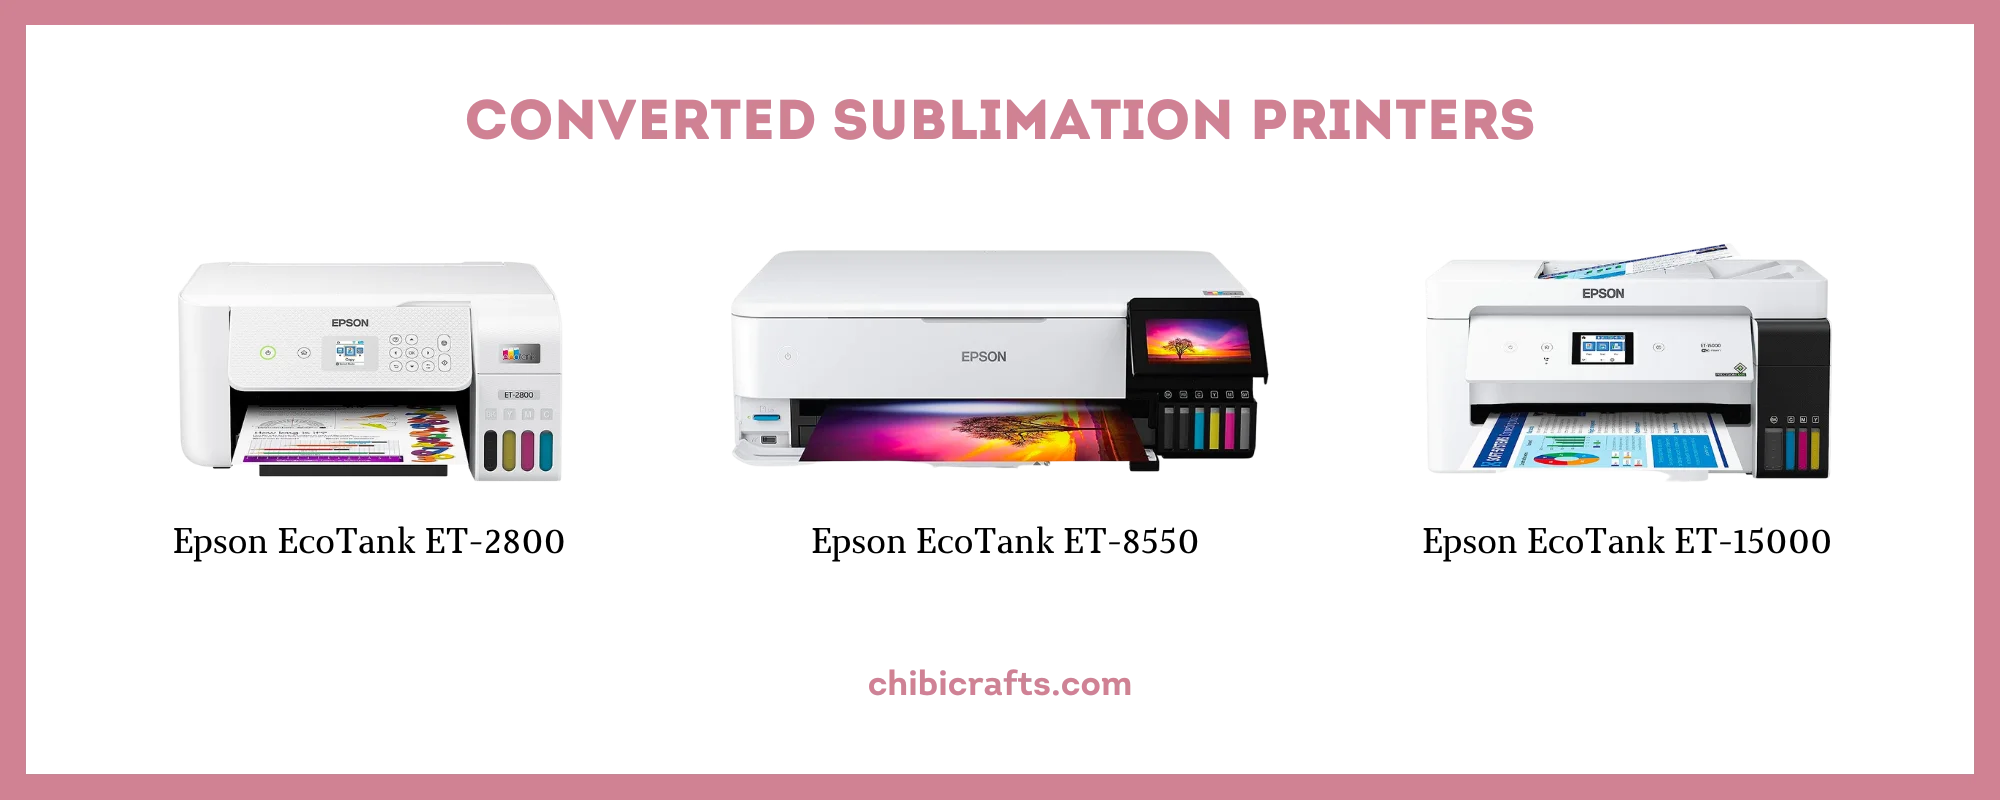
Converted inkjet printers are regular printers that have been converted to sublimation. Not all printers are suitable for this, but only those with the proper type of print head.
Epson EcoTank is the best option that almost all crafters choose. Simply put in the sublimation ink, and the printer is ready to use!
I bought the EcoTank ET-2800 as my first sublimation printer and still use it for small format designs.
There are two tricky things with converted printers:
- You can only convert a printer that hasn’t previously used standard ink.
- The warranty will be void. That’s a significant disadvantage. You won’t be able to call Epson if something happens to your printer, even if it crashes on the first day.
To avoid unnecessary risks, consider the Epson SureColor F170. It is a true sublimation printer by Epson, but it costs one-third less than Sawgrass.
Sublimation Ink
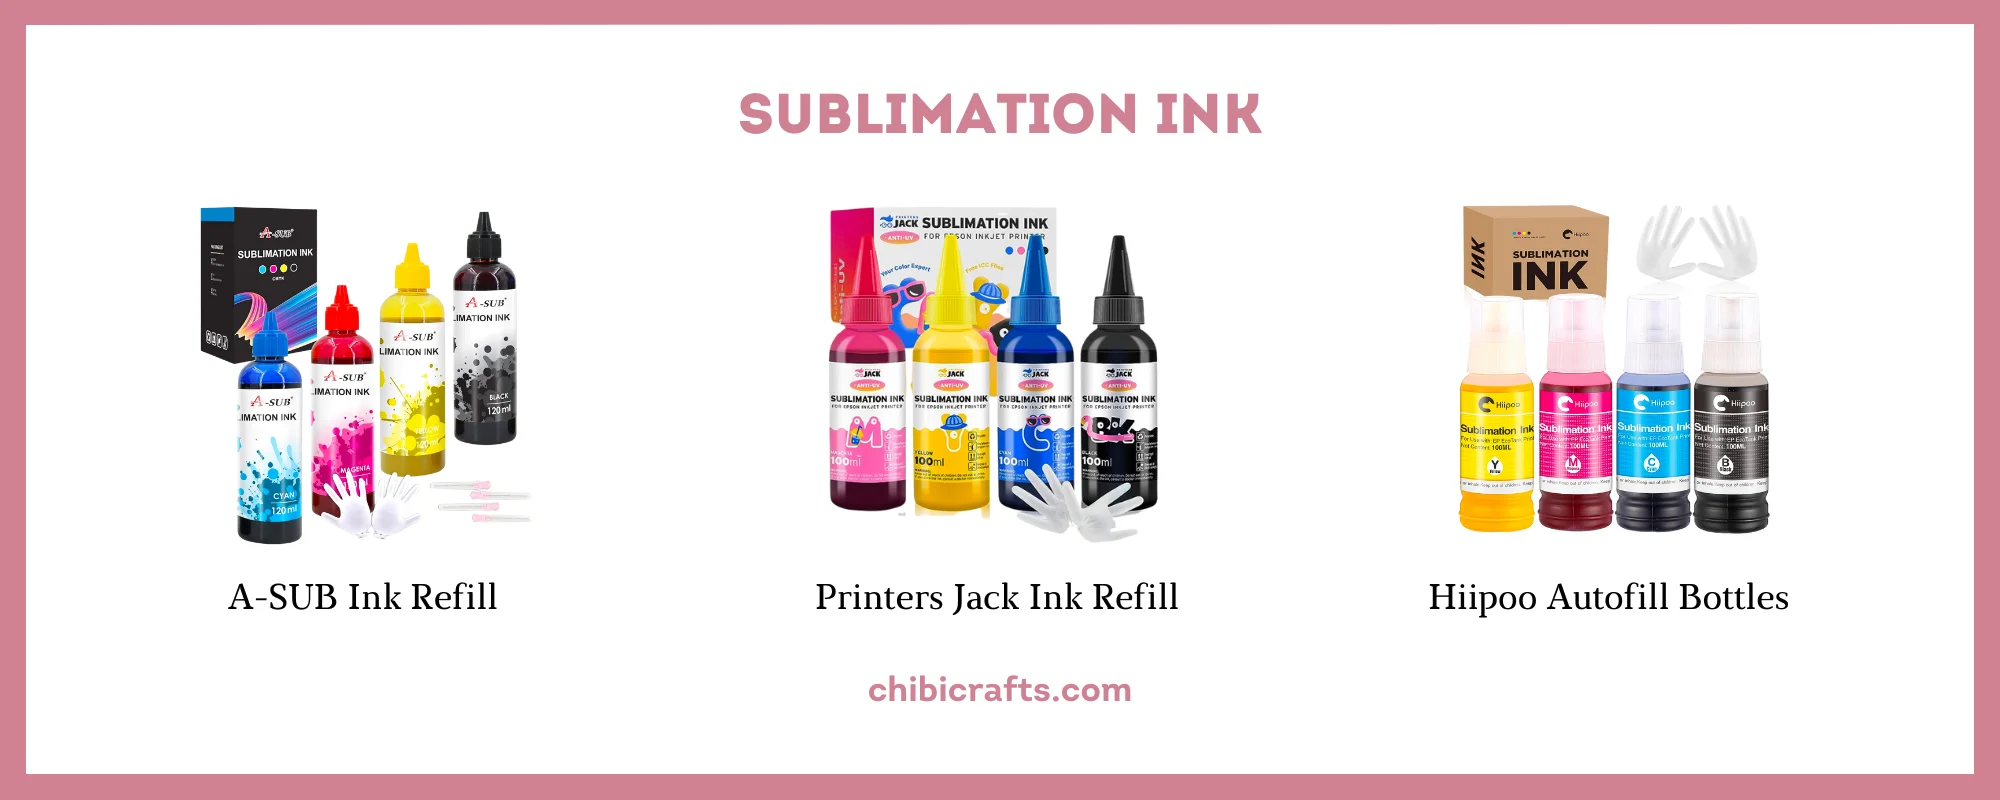
Regular ink won’t work for sublimation. When heated, it doesn’t transform into a gaseous state and cannot create a design.
Sawgrass or Epson SureColor use their own sublimation ink that comes with the printers. But if you are converting a regular inkjet printer, DO NOT use the ink that comes with it.
How to choose sublimation ink?
- Make sure the ink is compatible with your printer.
- Choose the syringe fill ink for manual control and autofill for a trouble-free experience. This is similar to the difference between a manual and automatic transmission in a car.
- Get a kit with twice the amount of black ink (such as this one) if you plan a lot of dark designs.
- Hiipoo ink tends to be pricier, while A-Sub and Printers Jack are more budget-friendly. However, all these brands produce high-quality results, so it really depends on your personal preference.
Sublimation Paper
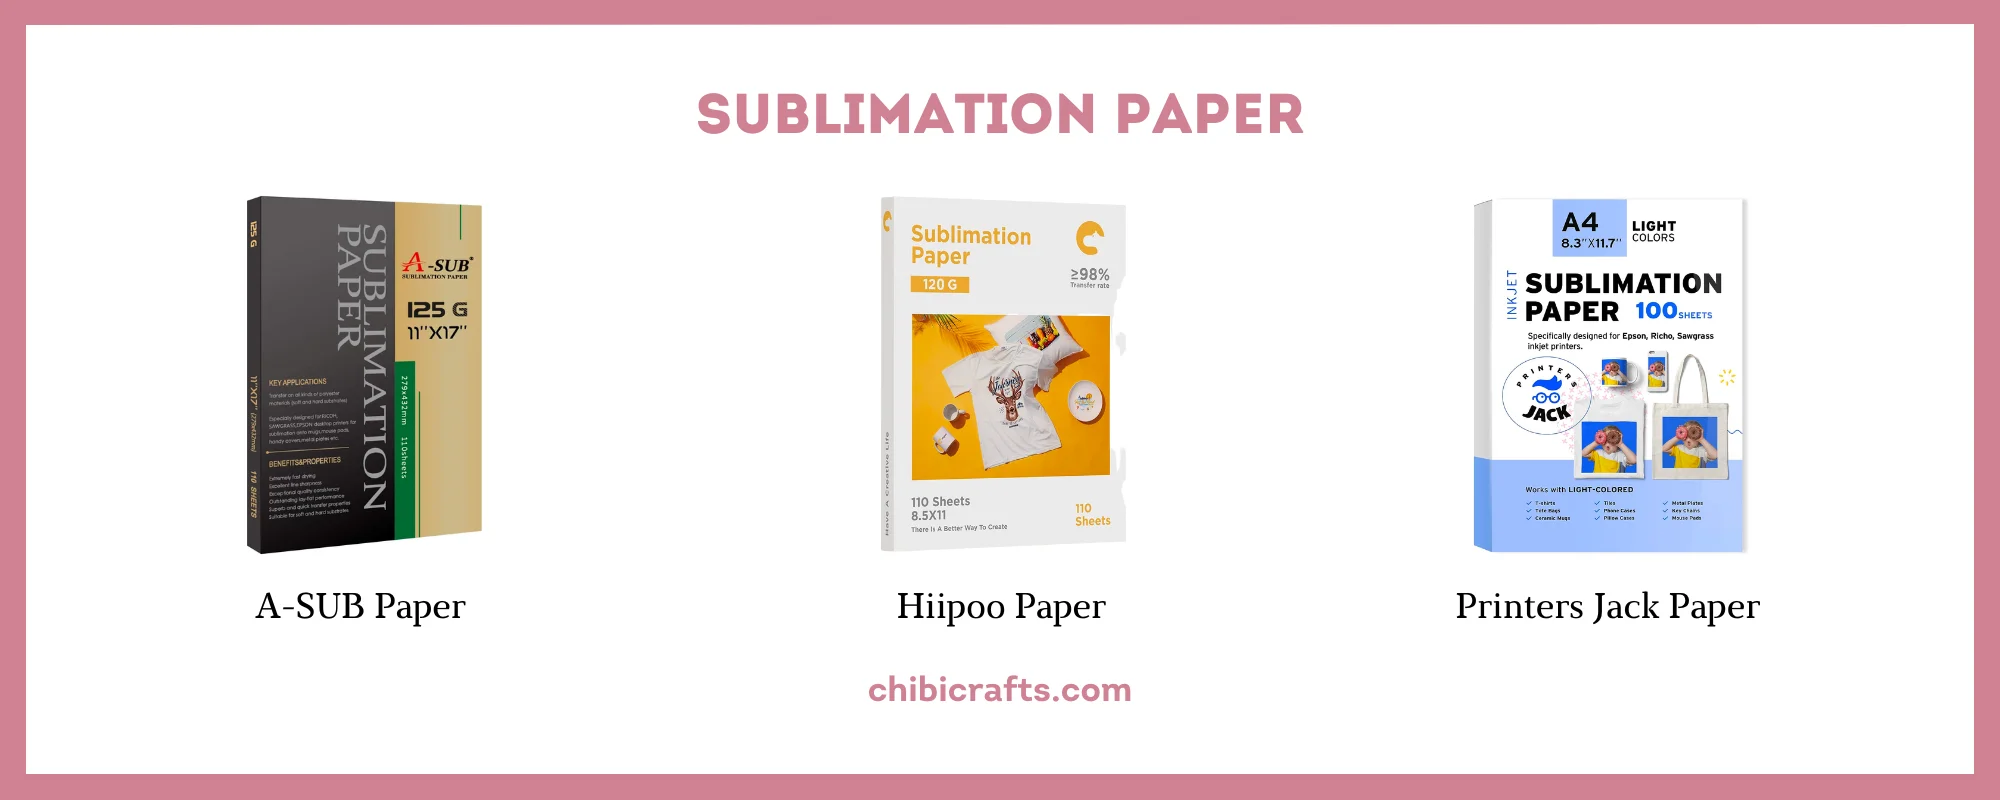
Sublimation paper has a special coating that holds the ink. It creates bright and colorful designs when heated.
Regular or laser copy paper lacks special coating, so using them for sublimation will lead to faded and washed-out pictures.
I’ve had great results with A-Sub and Hiipoo paper. I grab whichever is on sale, and they’ve always worked well.
Remember these two tips on sublimation paper:
- Size Matters. Paper comes in different sizes to match what you’re working on. There’s a standard size for everyday projects and a wide format for larger designs.
- Print side. Most brands make one side of the paper slightly lighter than the other. That’s your print side. Some companies even use watermarks on the back to get your attention.
Sublimation paper is a simple thing, yet crucial for bright and colorful prints. With the right paper, your designs will pop with color and clarity.
Sublimation Blanks
Sublimation blanks, also known as substrates, are blank items that absorb sublimation ink and retain the design after you press them with heat.
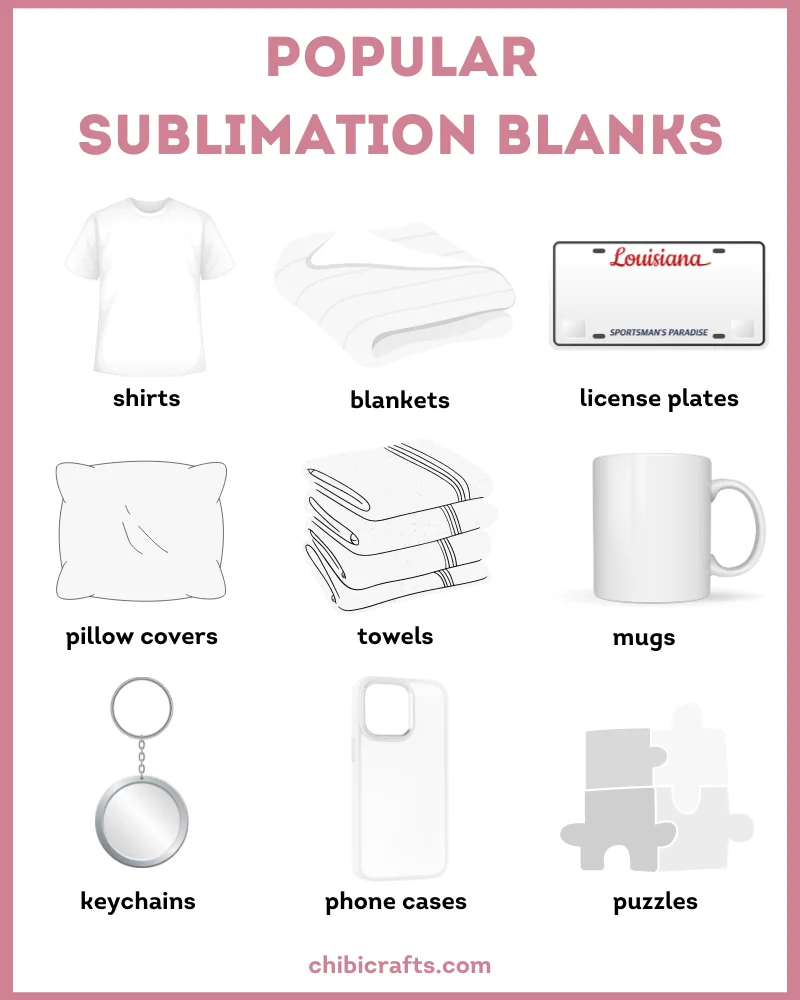
There are hundreds of different blanks on Amazon, in any dollar store like Dollar Tree, and in niche crafting stores.
Don’t limit yourself to polyester t-shirts!
You can sublimate on polyester (including blends with 65%+ polyester), acrylic, rayon, and things with sublimation coating.
This is what makes sublimation so magical – you can apply coating and print even on unusual items.
Simply take a 100% cotton shirt or towel, use a spray bottle of sublimation coating, and press your design.
But that’s not all! You can apply sublimation coating to lots of materials.
Like metal and ceramic, including license plates, tumblers, and mugs. Just make sure to remove the protective layer (a transparent plastic coating) that manufacturers often apply to protect the product.
You can also sublimate on glass and MDF (a type of engineered wood). Yes, even on things made of wood! Just paint them white and apply a layer of laminate before printing.
Here are some items I sublimated on:
- T-Shirts
- Sweatshirts
- Tumblers
- Tote Bags
- Pillow Covers
- Towels
- Makeup Bags
- License Plates
- Jigsaw Puzzles
- Mouse Pads
- Door Mats
- Luggage Handle Grips
- Keychains and Tag Holders
- … and many more to come!
Heat Press
Heat press transfers your designs onto the chosen items. It needs to hit a temperature of at least 375°F, although 400°F is typically preferred for sublimation.
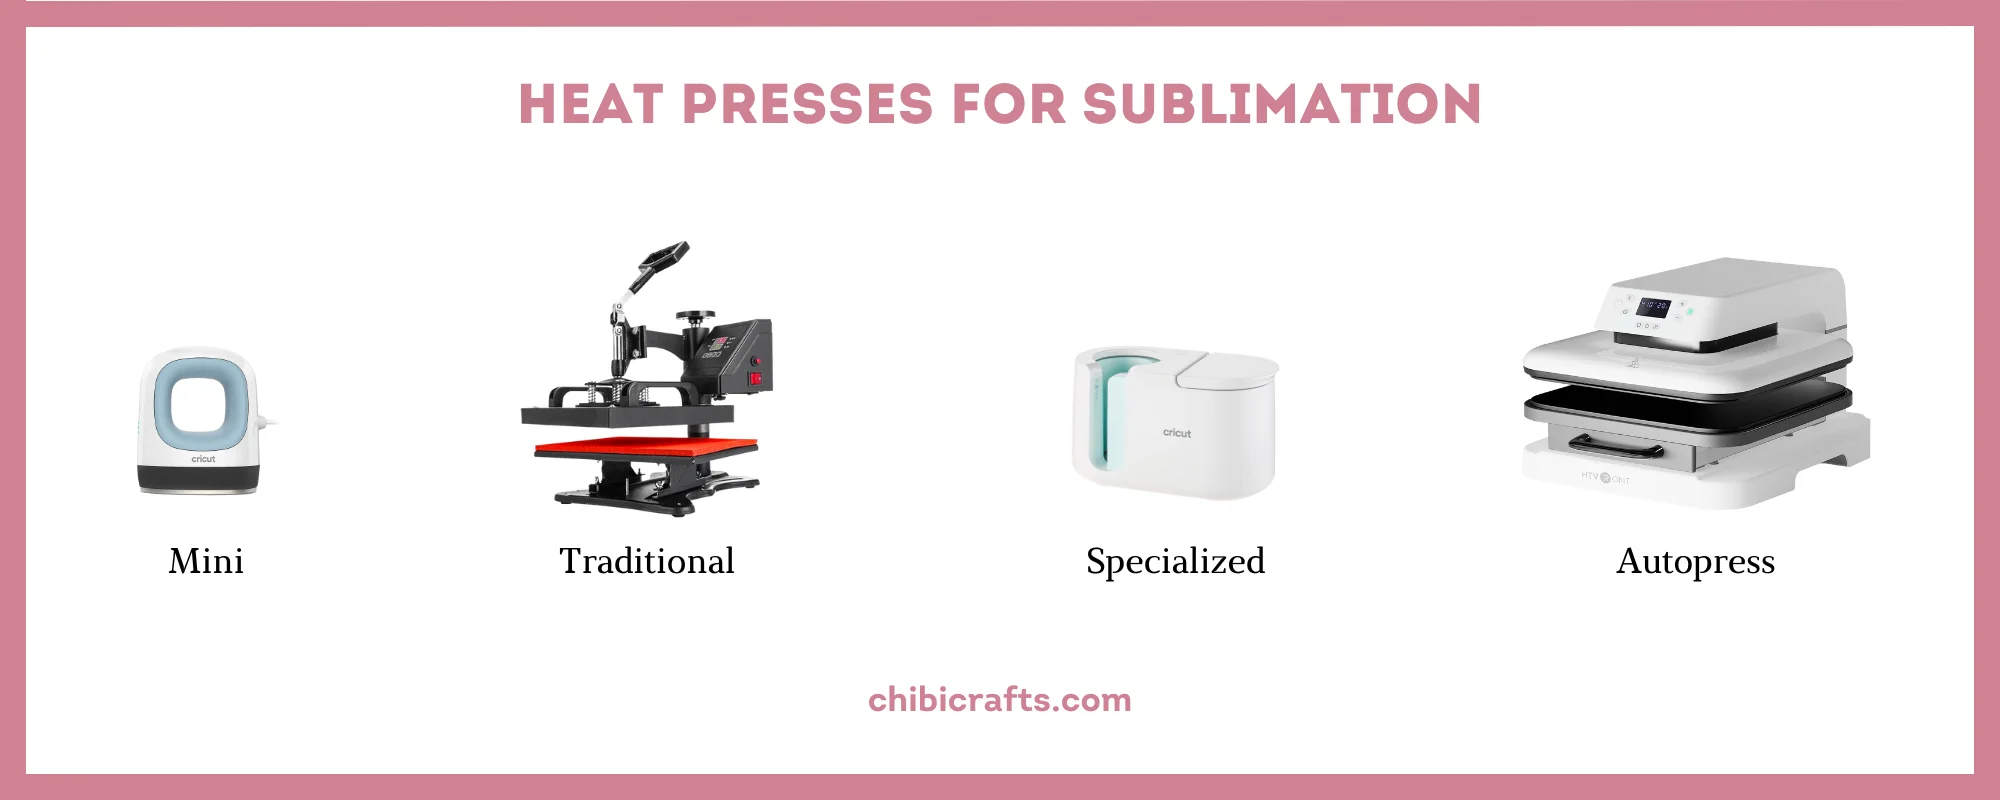
There are four types of heat presses to choose from:
- Traditional Heat Press: This is a good start for beginners. It’s straightforward to use, cheaper than other options, and extremely durable.
- Portable Heat Press: If you have a smaller workspace or need something portable, the Easypress is a compact choice.
- Advanced Autopress: For a more automated experience, the Autopress is a smart pick. It adjusts to the material thickness and controls the temperature for you. I LOVE IT because it lets me prepare the next design while it takes care of the current one.
- Specialized Heat Presses: Working on mugs, hats, or other irregular shapes? There are specialized machines like mug presses, hat presses, sublimation ovens, and multi-functional 5 in 1 heat presses to cater to different projects.
If you’re serious about sublimation and have the budget for it, then the Cricut Autopress is a fantastic option. It simplifies the process, making it almost effortless.
But if the Cricut Autopress is beyond your budget, check the HTVRONT Auto Heat Press. It’s a less popular brand that is 3 times cheaper (!) than the Cricut while offering similar automated features.
Other Supplies
Sublimation ink gets extremely hot while sublimating and can damage your surroundings or even harm you.
You can protect yourself with simple products that many people already have on hand:
- Heat Resistant Gloves – are just as important as oven mitts in the kitchen.
- Uncoated White Butcher Paper – to protect your heat platten from ink overflow.
- White Cardstock – to protect your pads.
- Heat Resistant Tape – to fix your design while pressing.
- Lint Roller and Microfiber Cloth – to remove debris and wipe down hard surfaces.
- Tape Measure and Crafting Scissors – to measure and cut.
These supplies help keep you safe and ensure you’re ready to start your sublimation projects. While different projects might need extra supplies, these basics will cover 90% of your needs.
Sublimation Printing Process
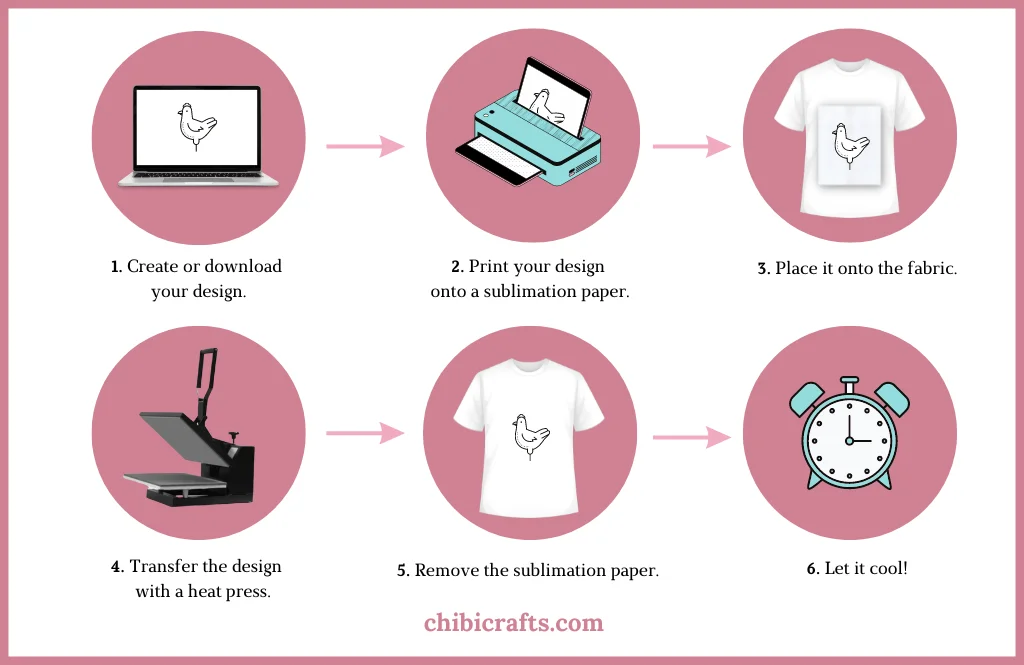
Here’s a breakdown of the sublimation printing process in 5 simple steps:
- Make or Find a Design: Begin with creating or finding a design you love. It can be a catchy phrase, a photo, or a unique illustration you created or bought from a professional designer.
- Print Your Design: Flip your picture to a mirror image before printing, and select the “Photo on Matte Paper” setting on your printer.
- Get Butcher Paper Ready: Place butcher paper around the area you’re printing on to catch any extra ink. For example, put the paper inside and under a T-shirt to stop the ink from getting on the back.
- Time to Press: Warm up your heat press as per the guidelines, put your item in, and press down. Usually, you’ll use high heat (around 400°F) and medium pressure for about 40 to 60 seconds.
- Peel and Cool: Once done, lift the press, peel off the paper gently, and let your item cool before you move it.
And that’s it! Sublimation projects take between 2 to 10 minutes, depending on what you’re making and how detailed your design is.
Check out the courses from Sawgrass Academy and various creators on Skillshare to sharpen your sublimation skills.
Where Can I Get Designs for Sublimation?
Getting a design for sublimation is easy, whether you want to create your own or buy a ready-made one.
- Creating Your Own Designs:
- You’ll need a computer, either a Mac or PC. While tablets work for simple designs, a computer supports advanced design software which might come in handy as you progress.
- I love using Canva for its ease of use and myriad free templates, but there are plenty of great design programs such as Cricut Design Space, Photoshop, and Sawgrass Exchange.
- Buying Pre-made Designs:
- If design isn’t your thing or you don’t have time for it, buying professional designs is a great option.
- Creative Fabrica is a niche service with thousands and thousands of designs. You’ll find everything you need to sublimate a T-shirt, mug, or tote bag.
- Etsy is a marketplace with DIY goods from thousands of sellers. They sell almost everything – from seeds to ebooks. It’s like a big online fair.
- Mix and Match:
- A little tip – I often buy professional designs and tweak them in Canva to add a personal touch. It’s an affordable and simple way to make a design uniquely yours.
- Selling Your Products:
- Planning to sell items with these designs? Make sure to check and follow the terms of commercial use for the graphics or designs you use.
Is It Hard to Get Started in Sublimation?
Starting with sublimation is like learning any other skill – it may seem challenging at first, but with a bit of guidance, you’ll be on your way to creating beautiful designs.
- Learning the Basics. You’ll be working on a computer to create or find designs, print them, and then use a heat press to transfer them onto your items. If this is all new to you, no worries! There are loads of free tutorials on YouTube to guide you.
- Setting Up Your Space. Sublimation does require some gear like a printer, heat press, and various supplies. Having a dedicated space, like a desk or a small room, can help keep things organized.
- Unleashing Your Creativity. Whether you’re tweaking ready-made designs or crafting your own from scratch, a little creativity goes a long way. Past artistic hobbies can be a plus, but if you’re new to the creative scene, you’ll find plenty of inspiration and easy-to-follow design tutorials online.
- Budgeting for Your New Hobby. Sublimation is a moderately priced hobby. A basic setup with a converted inkjet printer, heat press, and essential accessories could range from $500 to $700. If you opt for a purpose-built sublimation printer and kit, the cost might hover around $900 to $1,000 initially. Once set up, you might spend between $50 to $400 monthly on new supplies, depending on how many projects you take on.
Sublimation is a rewarding hobby that allows for a lot of creative expression. With a little patience, some tutorials, and a dash of creativity, you’ll be creating stunning sublimated items in no time!
5 Essential Sublimation Tips for Beginners
I’ve been doing sublimation since 2020 and made many silly mistakes early on. Here are 5 tips that will make your journey smoother:
- Keep It Clean. Clean your printer regularly to prevent any clogs from happening. Also, shield your workspace and any items you don’t want to be dyed using card stock and butcher paper. It’s like tidying up your room to avoid tripping over stuff.
- Use More Pressure. My prints looked faded because of the most basic mistake – incorrect pressure settings. Yes, it’s so simple! Follow the time and temperature settings from the manufacturer’s guide.
- Try Before You Buy Big. It’s tempting to buy in bulk for discounts, but test products first to ensure quality.
- Sublimation Ink Expires. Ink is a standard product with a shelf life. Usually, it’s between 12 and 24 months.
- Never Stop Learning. There are plenty of YouTube tutorials and free courses on sublimation, including printing, creating custom designs, and even growing your brand.
Sublimation FAQs
Can I use a regular printer for sublimation?
Yes, but only certain printers with the right kind of print head can be converted for sublimation
The Epson EcoTank line is the preferred option. You can also contact any electronics store’s support to find other compatible models.
Can I use a sublimation printer for regular prints?
No, converting a sublimation printer back to a standard printer requires a lot of effort and ink. It’s not a switch-back-and-forth kind of deal.
Can I sublimate on dark-colored fabrics?
Yes! Use glitter iron-on vinyl or white-flocked vinyl. It takes a bit more time and adds a little to the cost, but it’s doable.
Can I sublimate on uneven surfaces?
Absolutely, with specialized heat press machines, you can sublimate on irregular shapes.
Are there any limitations to images?
Go for high-quality images with a resolution of 300 dpi.
And remember, sublimation uses CMYK printing, so white, neon, and metallic colors won’t come out as expected.
How do I care for printed clothes?
- Wash it inside out to prevent damage from other items in the load.
- Wash colored and white garments separately.
- Use mild soap or detergent and water.
- Hang clothes on wooden or plastic hangers, or set the dryer to AIR or Low heat.
- Store in a cool, dry area.
DO NOT: use metal hangers, wash in hot water, iron, overload the washer/dryer, dry clean, use bleach or fabric softeners.
What is the easiest thing to sublimate?
T-shirts are a great starting point for beginners thanks to their simple shape and light color.
Is sublimation ink toxic?
No, as long as you stick to high-quality ink, paper, and blanks. These products don’t contain heavy metals or other toxins.
Beware of cheap inks as they might have harmful vapors.
Is sublimation printing eco-friendly?
Yes! Sublimation uses less water than other methods and the inks are often water-based, making it a more earth-friendly choice.
What’s Next?
After reading this sublimation printing for beginners guide, you should have a clear understanding of what sublimation is, the necessary supplies to get started, and how to avoid common mistakes. Now it’s time to roll up your sleeves and get started.
The first step might feel like a giant leap, but with every design, you’ll only get better!
Here are tutorials to help you with this:
- How to Convert Printer to Sublimation.
- What Can You Sublimate On?
- Sublimation Time and Temperature Guide.
- How to Fix Sublimation Mistakes.